In this article, I’ll show you how to download Turbo C for Windows (or Turbo C++), install Turbo C compiler on any version of Windows Operating System and write a C Program in Turbo C.
Turbo C and Turbo C++ are compilers for C and C++ (C plus plus) Programming Languages. They were originally developed by Borland Software Corporation as a combination of Integrated Development Environment (IDE) and Compiler.
Turbo C++ replaced Turbo C in the year 1990 and later both were discontinued. Turbo C/C++ was famous for its small size, speed of compilation, price, documentation and the whole integrated development environment.
The original Turbo C/C++ were 16 – bit compilers as they were developed for 16 – bit CPUs (Intel’s 8086 Series of Microprocessors).
Even though Turbo C is discontinued and is not compatible with the current generation systems (like Windows 7, 8 and 10), many programmers and developers still prefer to use the old Turbo C environment.
Personally, I started my C Programming training and development through Turbo C Compiler. So, in this post, I’ll take you through the process of how to download Turbo C, how to install Turbo C on any of the latest Windows Operating System i.e., Windows 7, Windows 8 and Windows 10, be it a 32 – bit version or a 64 – bit version.
What is a Compiler?
Before going in to Turbo C Compiler, we will first see what a Compiler is. A Compiler is a program or a software that transforms programs written in High Level Programming Languages such as C, C++, Python, etc. to Low Level Programming Languages like Assembly Language, Machine Code etc.
Turbo C is a C Programming Language Compiler that transforms programs written in C to Assembly or Machine Code to create an executable Program.
What makes Turbo C/C++ Special?
The original developers of Turbo C, Borland sold the Turbo C++ compiler to a company called Embarcadero Technologies. The Turbo C++ Compiler was later upgraded to their flagship Compiler called C++ Builder.
There are many Compilers for C and C++ Programming Languages but what makes Turbo C/C++ special is its speed of Compilation of the Programs, size of the overall software (Turbo C occupies very little memory), compatibility with wide range of I/O Modules, support for large projects, etc.
Hence, many programmers and software developers still prefer the old Turbo C Compiler and IDE to keep that nostalgic feel going on.
Download Turbo C for Windows (Turbo C++)
If Turbo C/C++ is discontinued, then how can we install it in our system? Even though Turbo C++ is discontinued, there are many simulators that work in a similar way to the original Turbo C and Turbo C++ and present that retro look with its iconic blue screen.
DOSBox is one such software that emulates a DOS Operating System. Using DOSBox, we can run x86 compatible games and software on our latest systems.
Using DOSBox, developers achieved to bring back the Turbo C++ Compiler to the latest version of Windows as the original Turbo C/C++ is a 16 – bit compiler.
Now, in order to install Turbo C++ on your computer (any 32 – bit or 64 – bit computer running on any Windows version from Windows 7), there are two ways you can proceed.
One way is to download the DOSBox Emulator and Turbo C++ Compiler separately and install them both on your computer. The other way is to simply download and install the Turbo C++ for Windows Application.
To download the Turbo C++ for Windows, follow this link.
How to Install Turbo C for Windows?
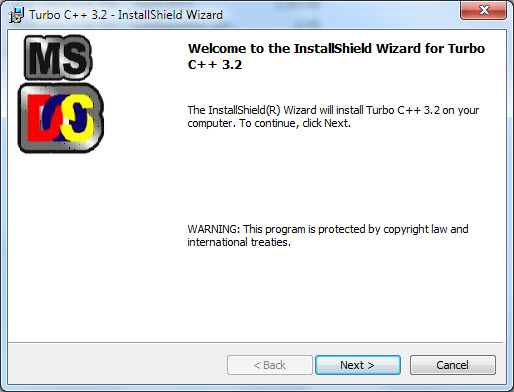
After downloading the application (it will be downloaded in a zip file), extract the zip file and double click on the setup.exe file (or on the Turbo C++ 3.2.msi file). The installation wizard will open. Click on next.
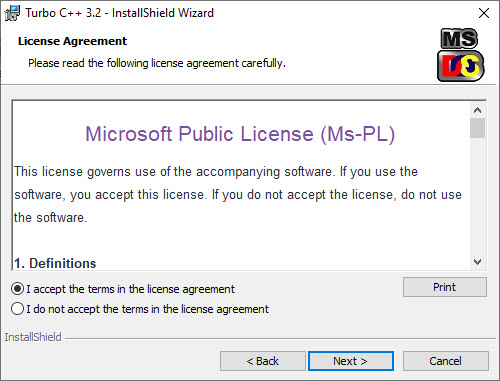
The license screen appears, accept the license terms and click on next.
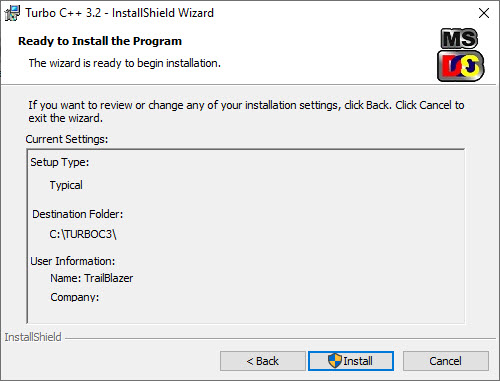
One disadvantage of this Turbo C Installation on Windows is that you cannot modify the installation directory. The default location is “C:\TURBOC3\”.
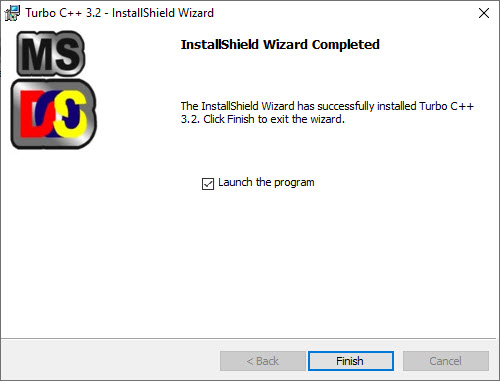
Continue with the installation by clicking ‘Install’. After installation is complete, you will get a launch the application checkbox. Keep it checked and click on finish.
A desktop shortcut will be created, using which you can launch the application. After launching the application, you will get a control screen. In order to start the Turbo C++ Compiler, click on the “Start Turbo C++” link on the bottom right part of the window.
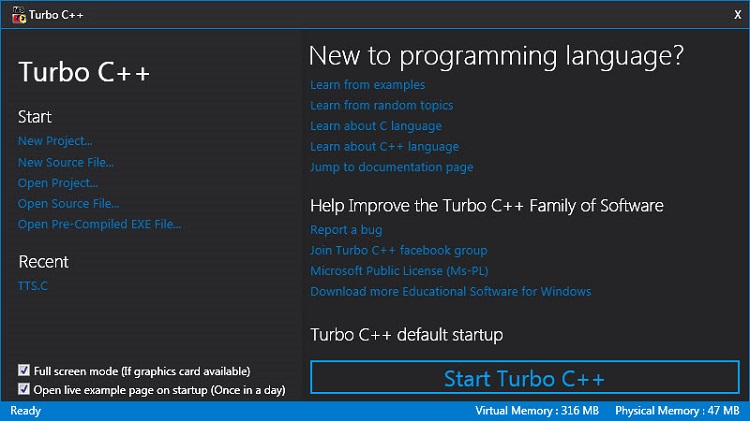
Before clicking on the Start Turbo C++ Link, you can check the Full Screen Mode option on the bottom left part of the control window. This option will allow you to directly start the Turbo C++ in full screen mode.
How to Configure Turbo C++?
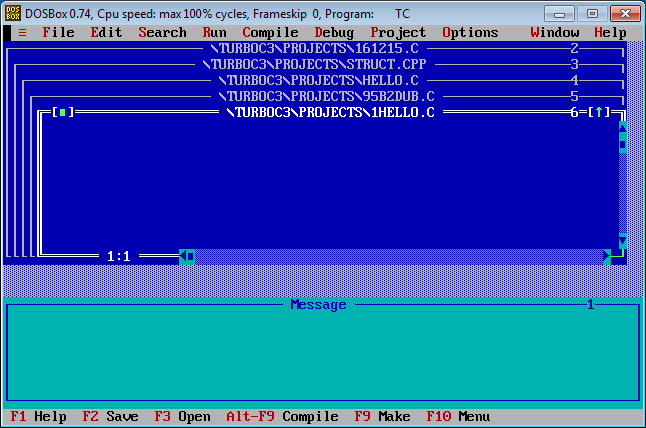
After clicking on the Start Turbo C++ link, you will automatically get the Turbo C++ Window with its iconic blue screen.
TIP: To Toggle between window mode and full screen mode, use Alt + Enter.
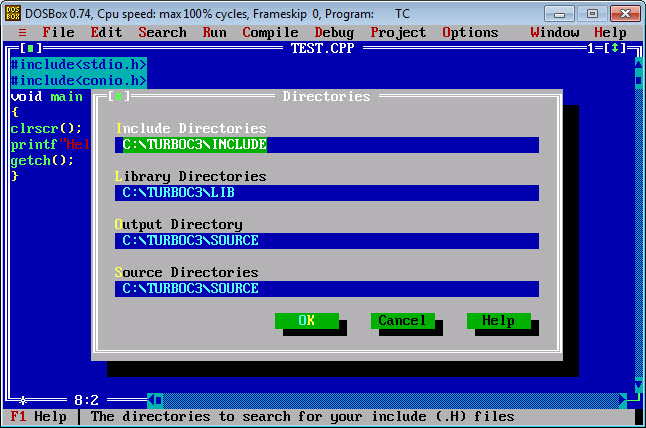
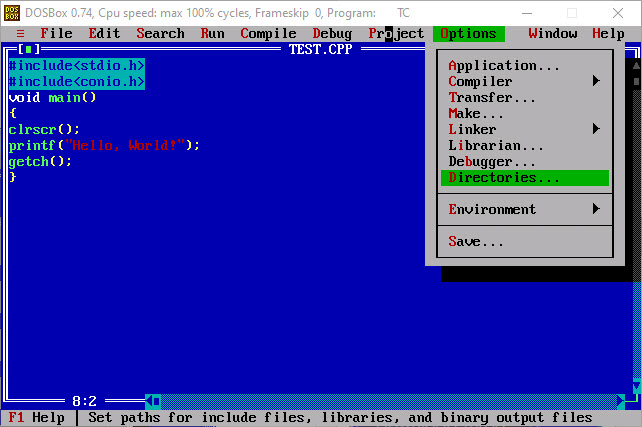
After the Turbo C++ is launched, the first step you need to do is to make sure that all the directories associated with Turbo C++ are correct. For example, the directory INCLUDE contains all the header files like STDIO, CONIO, MATH, etc.
To check, go to Options in the Menu Bar (shortcut is Alt+o) and select ‘Directories’.
In our case the directories are as follows:
- Include Directories: C:\TURBOC3\INCLUDE
- Library Directories: C:\TURBOC3\LIB
- Output Directory: C:\TURBOC3\SOURCE
- Source Directories: C:\TURBOC3\SOURCE
Alternative Download for Windows 7
If you are still using Windows 7 or Windows 8 in your computer and if you want to install Turbo C in your Windows 7 system, then some users complained that the above method isn’t working properly. So, after some research, I found a new Turbo C Application which can run on Windows 7 machines.
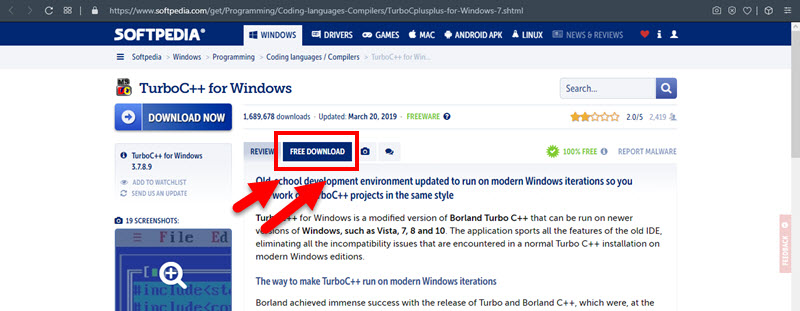
To download Turbo C for Windows 7, go to this link and click on the “FREE DOWNLOAD” option.
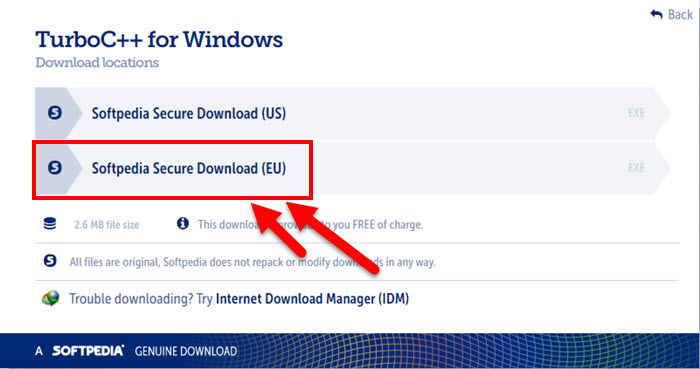
Two mirror links pop-up and after trying for sometime, I found that I had to use a VPN to download the file and that too only from the EU server.
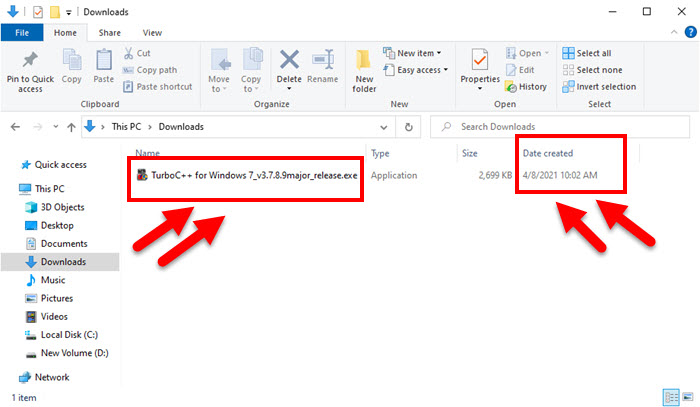
The latest version at the time writing this tutorial was “TurboC++ for Windows 7_v3.7.8.9major_release”. As you can see, I downloaded this in 2021 and the link is working.
NOTE: If downloading from the above link doesn’t work, then you might have to use a VPN Connection. Try any free VPN extensions for Chrome and see if you are able to download it.
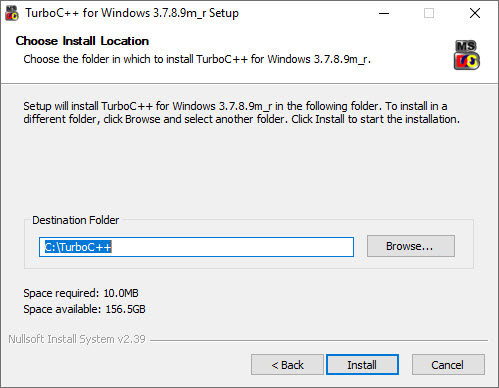
The installation is very simple, just follow the on-screen instructions. An advantage with this installation is that you can modify the installation location but the default location stays “C:\TurboC++\”.
First Program in Turbo C++
After setting up the directories, you are ready to begin programming in Turbo C++. So, to start writing a program, go to File Tab and Click on New (you can use the keyboard shortcuts). A new editor window will be opened.
The first program we usually write in C Language is the Hello World. Without further ado, start typing the code. The program for printing “Hello, World!” is given below.
#include<conio.h>
void main ()
{
clrscr();
printf(“Hello, World!”);
getch();
}
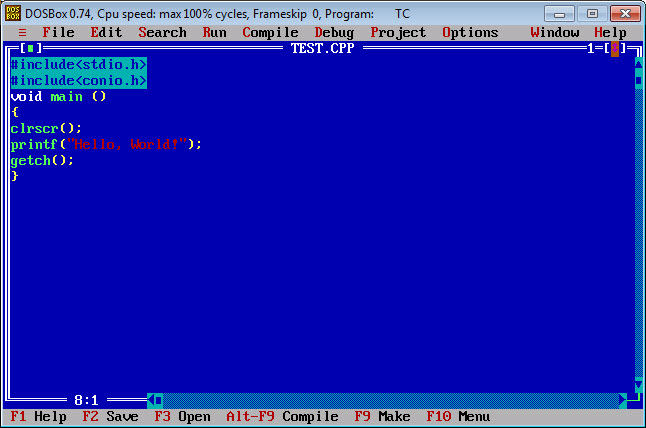
To save the file, click File –> Save or F2. Type in an appropriate name, like TEST.C (or TEST.CPP for C++ file). Compile the code by pressing Alt + F9. A small window will popup mentioning the result of the compilation (like success, error, warnings, etc.). After successful compilation, in order to run the program, enter Ctrl + F9. You will get the result in a new window.
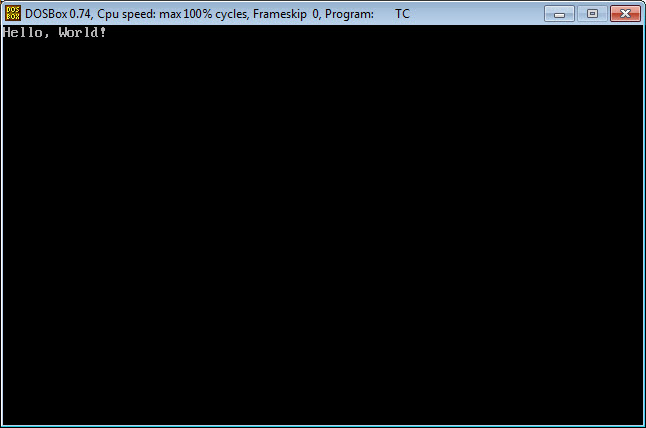
You have successfully downloaded Turbo C++, installed it in your latest Windows System and written your first C Program.
In this tutorial, I have shown you how to download Turbo C for Windows, install Turbo C on any latest version of Windows (Windows 7, 8 or 10) and also how to write C Program in Turbo C.

No comments:
Post a Comment